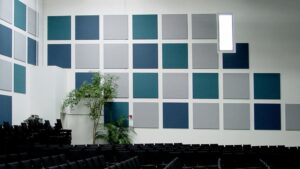

Acoustic panels are an essential solution for reducing noise and enhancing sound quality in various environments, including offices, restaurants, studios, and schools. Among the different types of acoustic panels, Stretch fabric acoustic panels are a popular choice due to their effectiveness, aesthetic appeal, and versatility. However, like any other installation, these panels may require fixing over time due to sagging fabric, improper installation, or accidental damage.
If you’re looking to restore your stretch fabric acoustic panels to their original condition, here’s a step-by-step guide to help you fix them efficiently.

Common Issues with Stretch Fabric Acoustic Panels
Before diving into the fixing process, it’s important to identify the common problems that may arise with stretch fabric acoustic panels:
- Sagging Fabric: Over time, fabric may become loose, creating wrinkles or an uneven surface.
- Frame Misalignment: The panel’s frame may shift due to poor installation or external pressure.
- Fabric Detachment: If the fabric is not secured properly, it may start to detach from the frame.
- Damage from External Factors: Tears, stains, or accidental impacts can affect both the look and performance of the panel.
Step-by-Step Guide to Fixing Stretch Fabric Acoustic Panels
1. Assess the Damage
Start by carefully inspecting the panels to determine the issue. Check if the fabric is loose, torn, or stained. If the frame is misaligned, inspect whether the mounting system is intact.
2. Remove the Fabric (If Necessary)
For serious fabric sagging or detachment, it’s best to remove the fabric entirely before fixing the panel.
- Use a flat tool or your hands to gently release the fabric from the edges.
- Be careful not to damage the fabric, as you may need to reuse it.
3. Fix the Frame
If the frame has shifted or become loose, tighten any screws or clips holding it in place.
- For wooden frames, use a drill or screwdriver to secure the joints.
- For metal frames, ensure all fasteners are properly aligned and tightened.
4. Re-stretch the Fabric
To achieve a professional and smooth finish, stretch the fabric evenly across the panel.
- Start from one side and secure the fabric with a stapler, clips, or an adhesive system.
- Gradually pull and attach the fabric across the panel, ensuring there are no wrinkles.
- Use a fabric tensioning tool if necessary to maintain uniform tightness.
5. Secure the Fabric Edges
Once the fabric is stretched properly, secure the edges to prevent future sagging.
- Trim any excess fabric for a neat finish.
- If using an adhesive-based system, allow it to dry completely before re-mounting.
6. Reinstall the Panel
After fixing the fabric and frame, reinstall the panel in its original position.
- If wall-mounted, use sturdy brackets or clips to keep it secure.
- If free-standing, ensure the panel remains upright and balanced.
Preventative Maintenance Tips
To extend the lifespan of your stretch fabric acoustic panels and avoid frequent repairs:
- Regularly inspect panels for signs of sagging or detachment.
- Keep them clean by dusting them and avoiding direct exposure to moisture.
- Avoid excessive pressure or impact on the panels to maintain their shape and function.

Conclusion
Fixing Stretch fabric acoustic panels is a straightforward process when done carefully and correctly. Whether you’re addressing sagging fabric, a loose frame, or reinstallation issues, following these steps will help restore your panels to their best condition.
For high-quality, durable, and aesthetically pleasing acoustic solutions, Akcoustic offers expertly designed panels that blend performance with style. Our team of acoustic engineers and designers ensures that every product meets industry standards and enhances your space’s acoustic quality.
Looking for the best acoustic solutions? Get in touch with Akcoustic today.